

"💡Build, Deploy, Automate💡 Mastering AWS DevOps with CodeCommit, CodeBuild, CodeDeploy & CodePipeline"


"Welcome, Tech Enthusiasts! 🌐✨ Dive into our easy-to-follow guide and discover how to streamline your software projects with AWS's Devops tools: CodeCommit, CodeBuild, CodeDeploy, and CodePipeline. Whether you're starting fresh or aiming to boost your automation skills, we're here to help every step of the way. Join us as we unlock the secrets to making your deployment work smoother, faster, and more efficient. Let's embark on this exciting journey together and harness the full potential of AWS DevOps tools!"
Introduction
In this project, we'll take a deep dive into the seamless integration and automation capabilities of AWS, focusing on four key services: CodeCommit, CodeBuild, CodeDeploy, and CodePipeline. Lets have a brief overview of these services first:
AWS CodeCommit: Think of CodeCommit as your ultra-secure, private code vault. It's the place where all your project code is safely stored and shared within your team, similar to GitHub or GitLab. These platforms also offer a collaborative environment for source code management, allowing teams to track and contribute to projects seamlessly.
AWS CodeBuild: A build service that compiles your source code, runs tests, and produces ready-to-deploy software packages. It's like having Jenkins or Travis CI in your toolkit, which also automate the process of testing code for bugs and building it for deployment, ensuring your code is always in its best form.
AWS CodeDeploy: A deployment service that allows you to deploy your application to various AWS services like EC2, Lambda, and ECS, as well as on-premises servers. It automates application updates, enabling consistent deployments and the ability to quickly release new features.
AWS CodePipeline: A continuous integration and continuous delivery (CI/CD) service that automates the steps required to release your software changes. By modeling the different stages of your build, test, and deployment processes, CodePipeline helps you update your applications quickly and reliably.
Prerequisites
AWS Free Tier Account (For Resource Creation)
Understanding of Basic AWS services
Docker Hub Account (For Docker Image Storage)
Source Code Repository
https://github.com/Ashish-Dobhal-Devops/AWS-Devops-Project.git
Step by step Guide
Setting Up AWS CodeCommit for Source Code Management
Configuring AWS CodeBuild for Continuous Integration
Configuring AWS CodeDeploy to deploy our application
Automating Workflow with AWS CodePipeline
Setting Up AWS CodeCommit for Source Code Management
Before we get into using AWS CodeCommit, our first step involves setting up an AWS EC2 instance. This versatile virtual server will serve dual purposes in our project:
Moving your project from GitHub to AWS CodeCommit: First, we'll use this EC2 instance to copy our project from GitHub. We'll clone the repo onto our server and next, we'll upload the files from the server to our AWS CodeCommit repository. You can do this via your local system as well by using tools like visual studio code etc.
Deployment with CodeDeploy: Crucially, this EC2 instance will be directly utilized by AWS CodeDeploy in the deployment phase of our project. CodeDeploy will deploy the latest version of our code onto this instance, automating the deployment process and ensuring that our application is always up to date with the latest changes.
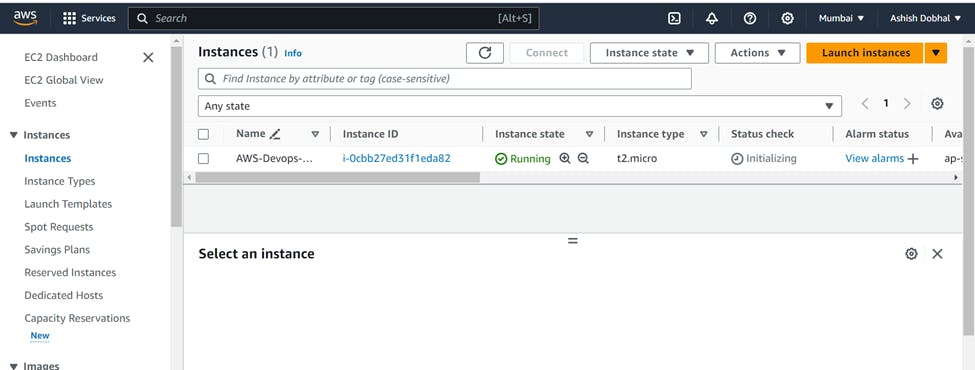
Creation of EC2 Instance
We will create an EC2 instance from AWS console with following specifications:
Name: AWS-Devops-Project-Server (you can keep as per your choice)
Image: Ubuntu 22.04
Instance Type: t2.micro
Security group: SSH (22), http (80) & https (443) rules enabled
Storage: Default (8GB)
Creation of CodeCommit repository and creation of IAM User
Now go to CodeCommit service in AWS console and create one repo of your choice:


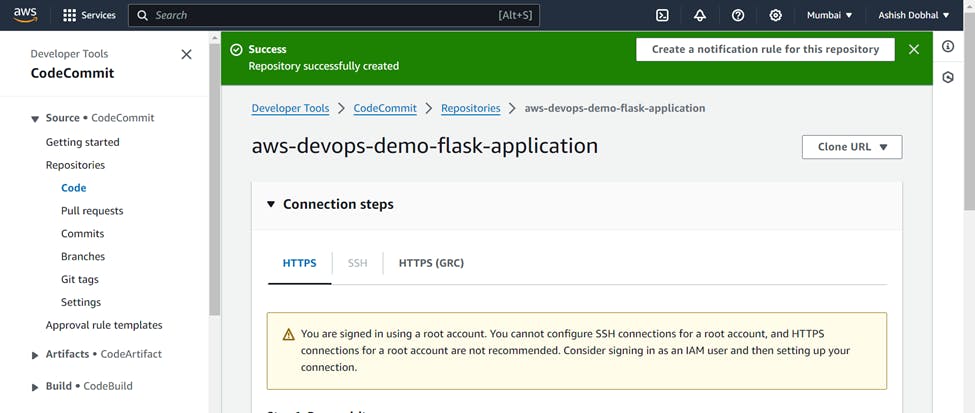
Our repo has been created in AWS Codecommit, but you can see one warning message that using root account to access this repo is not recommended. So we will create an IAM user to connect to this CodeCommit repository.
For this go to IAM section in AWS and create one IAM User.

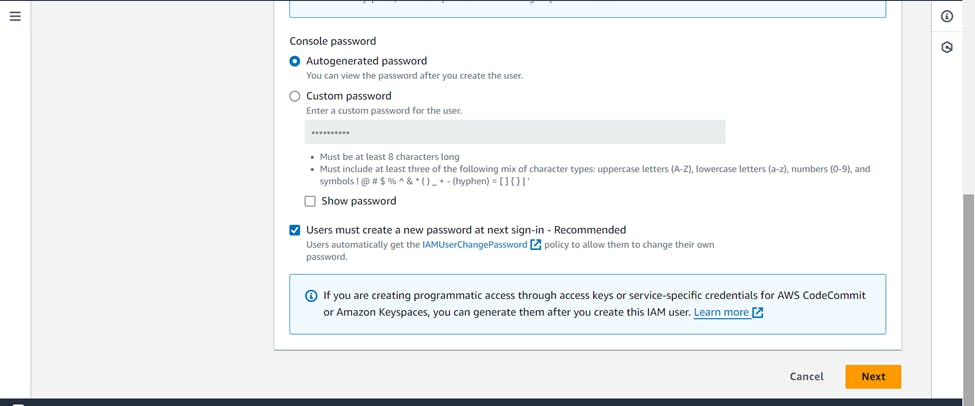
For the practice purpose, I have assigned administrator permissions to the user

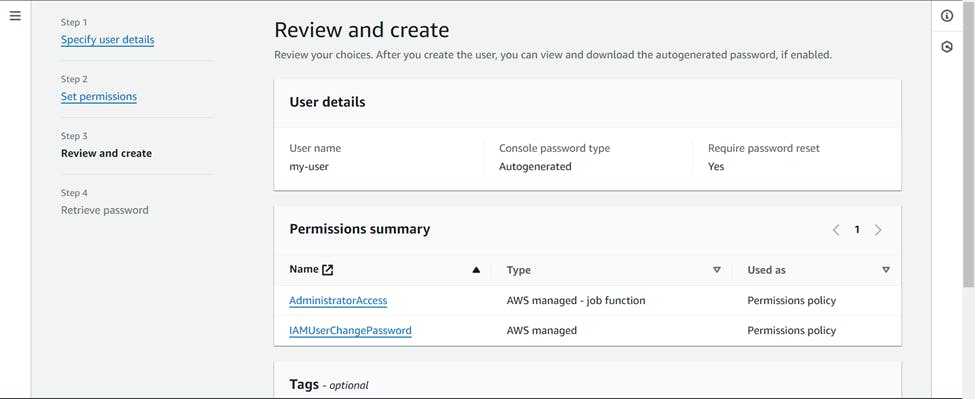
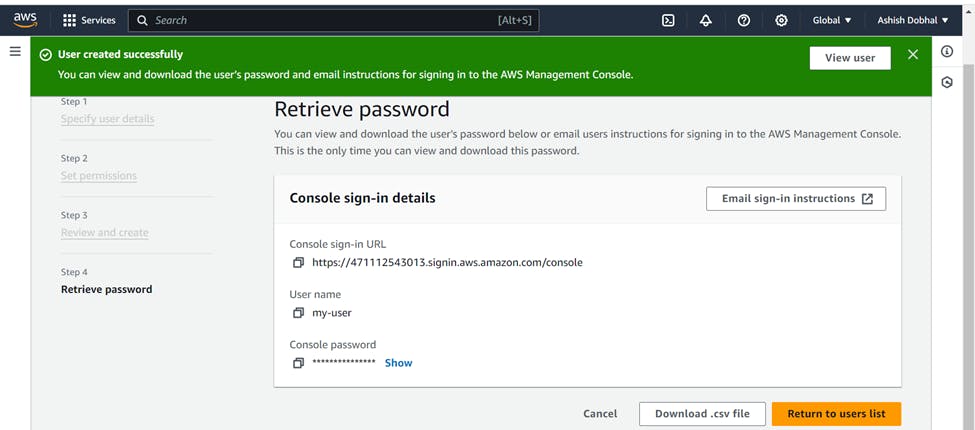
Your IAM user has been created. Download the csv file to save the credentials of IAM user.
Setting up communication between IAM User and CodeCommit service
Now in order to let our IAM user to communicate with CodeCommit service, we need to provide him full access of CodeCommit service and need to have credentials by which CodeCommit service will authenticate this IAM User.
For this again go to IAM section >>> Select User >>> Add permissions >>> Select attach policies directly >>> choose "AWSCodeCommitPowerUser" >>> Add permissions


Now the IAM user has the required permissions but we need to have the credentials so that it can communicate with CodeCommit repository.
For this go to IAM user >>> Choose Security credentials >>> Scroll down and select "HTTPS Git credentials for AWS CodeCommit" >>> Generate credentials

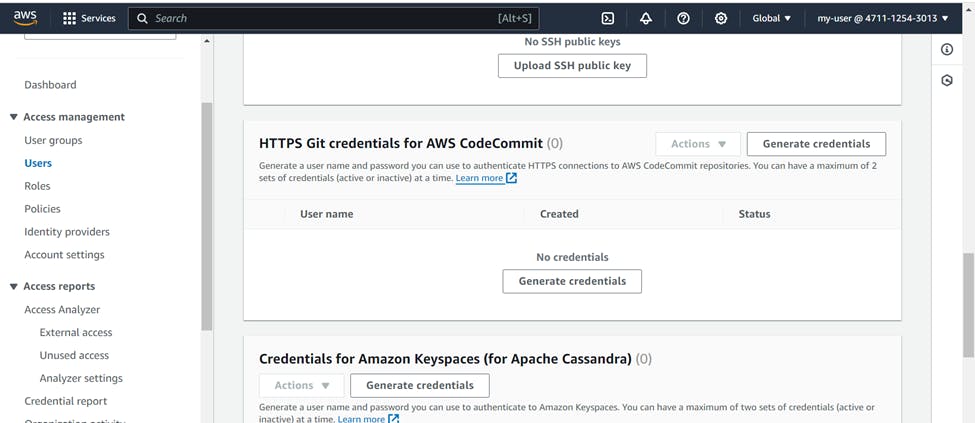

Your credentials have been generated, download the credentials file to save for future use.
Clone the GitHub Repo to get the source code
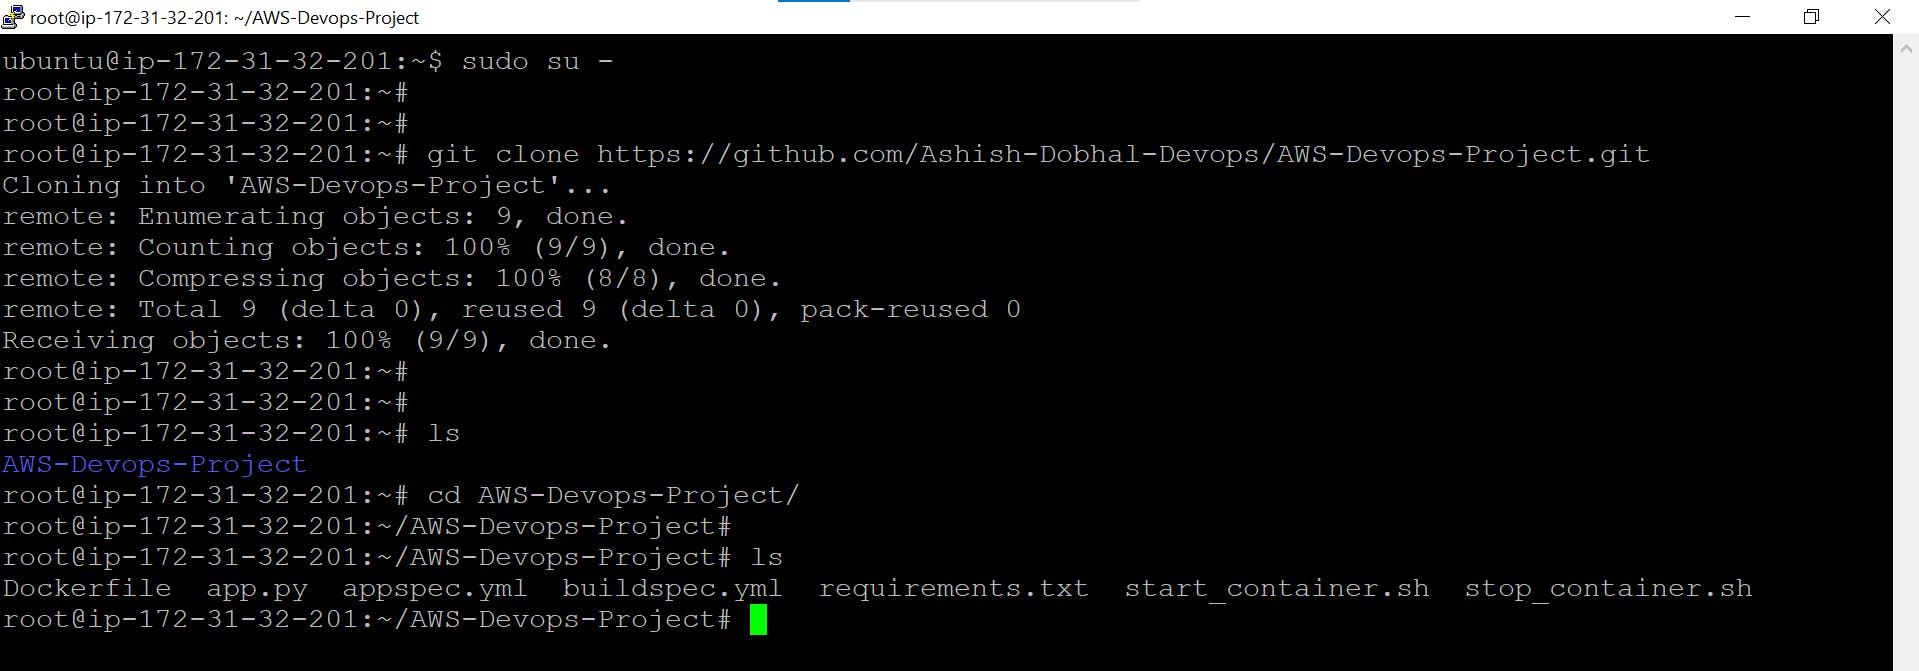
Now SSH into your EC2 instance and clone the GitHub repo
sudo su -         # Switch to Super User
git clone https://github.com/Ashish-Dobhal-Devops/AWS-Devops-Project.git  # Clone the GitHub repo
Push the source code to CodeCommit repository
In the earlier steps we already created a CodeCommit repository, now we will push this source code to that repository. Create a separate directory in your server and move all the above files there and use below commands to push these files in CodeCommit repo.
git init     # Initializing git
git add .
git commit -m "Moving files to CodeCommit"   # Committing the files with a commit messgae
git remote add origin https://git-codecommit.ap-south-1.amazonaws.com/v1/repos/aws-devops-demo-flask-application    # Adding the CodeCommit repo to push the files, please replace with your CodeCommit repo URL
git push -u origin master    # Pushing the files to the master branch of the repo
# Username: Provide Your IAM user username for CodeCommit
# Password: Provide Your IAM user password for CodeCommit


Now our source code has been successfully moved to the repo in CodeCommit.

Configuring AWS CodeBuild for Continuous Integration
Now that our code is in the CodeCommit repository, we'll use AWS CodeBuild to automatically test and build a Docker image from this code, streamlining our continuous integration process.
Understanding buildspec.yml file
The key step here is crafting a buildspec.yml file, This file is essentially the blueprint that CodeBuild follows to test, build, and push our Docker image.
version: 0.2

env:
  parameter-store:
    DOCKER_USERNAME: flask-app-docker-username
    DOCKER_PASSWORD: flask-app-docker-password
    DOCKER_URL: flask-app-docker-URL
phases:
  install:
    runtime-versions:
      python: 3.11
  pre_build:
    commands:
      - echo "Installing dependencies..."
      - pip install --upgrade pip
      - pip install -r requirements.txt
  build:
    commands:
      - echo "Running tests..."
      - echo "Building Docker image..."
      - echo "$DOCKER_PASSWORD" | docker login -u "$DOCKER_USERNAME" --password-stdin "$DOCKER_URL"
      - docker build -t "$DOCKER_URL/$DOCKER_USERNAME/python-flask-app-aws-devops:latest" .
      - docker push "$DOCKER_URL/$DOCKER_USERNAME/python-flask-app-aws-devops:latest"
  post_build:
    commands:
      - echo "Build completed successfully!"
artifacts:
  files: '**/*'
Here in env section, we have defined crucial credentials and the Docker repository URL securely stored in AWS Parameter Store, ensuring our process is both secure and streamlined. (Please make sure to change it according to your credentials).
In the pre-build phase, we used a requirements.txt file listing all necessary dependencies for installation prior to image creation
In the Build phase, we run application tests for reliability, log into Docker using AWS-stored credentials, and then build, tag, and push our Docker image to the repository.
In the artifacts section, we specify all build environment files to be saved as artifacts. This can be useful for debugging or further processing.
Securing Credentials via AWS Systems Manager
Secure your credentials with AWS Systems Manager to use them as environment variables in your buildspec.yml file by following these steps:
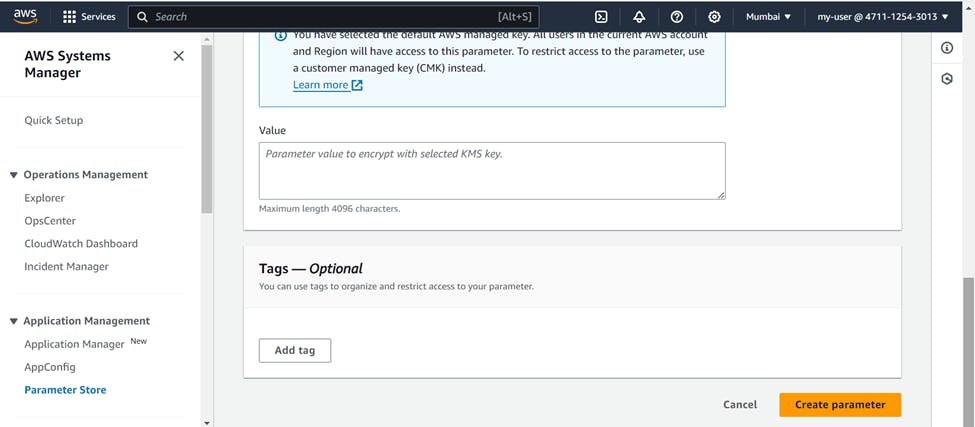
Go to AWS Systems Manager >>> select parameter store >>> Create parameter


Name ( Your Choice ) >>> Tier ( Standard ) >>> Type ( SecureString ) >>> In values ( Put the original value like your password) >>> Create Parameter


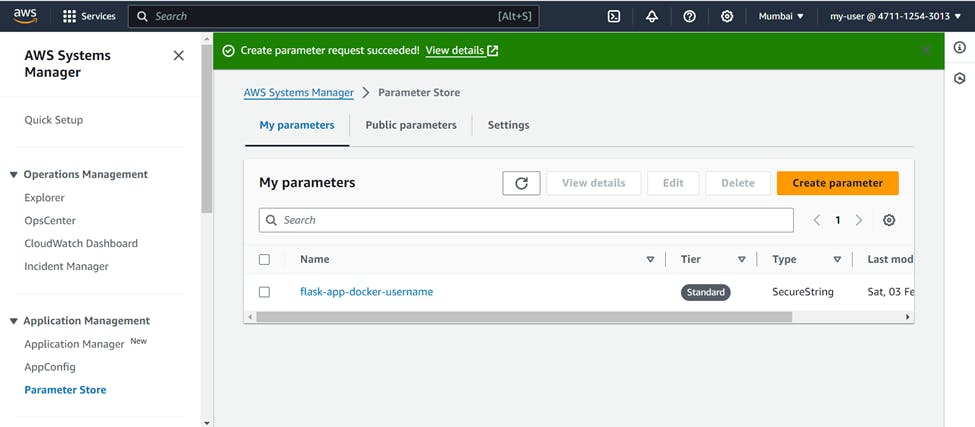
Similarly create the parameters for other values also.
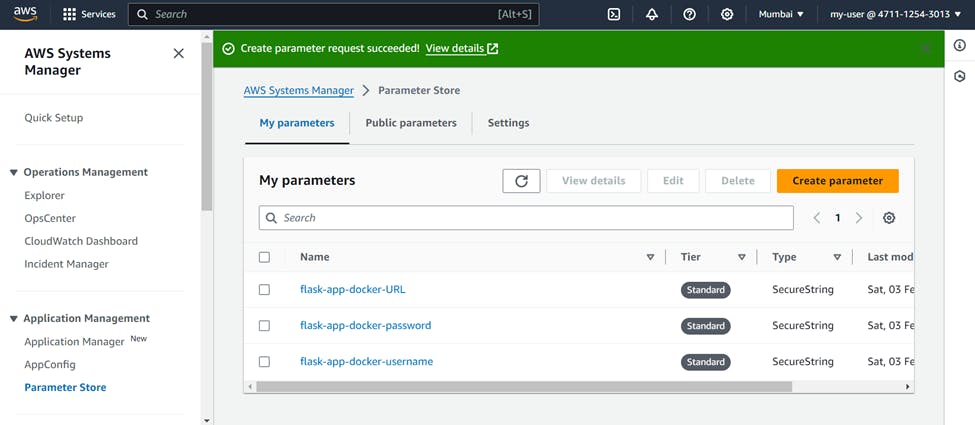
Now you can use these parameters as environment variables in your buildspec.yml file.
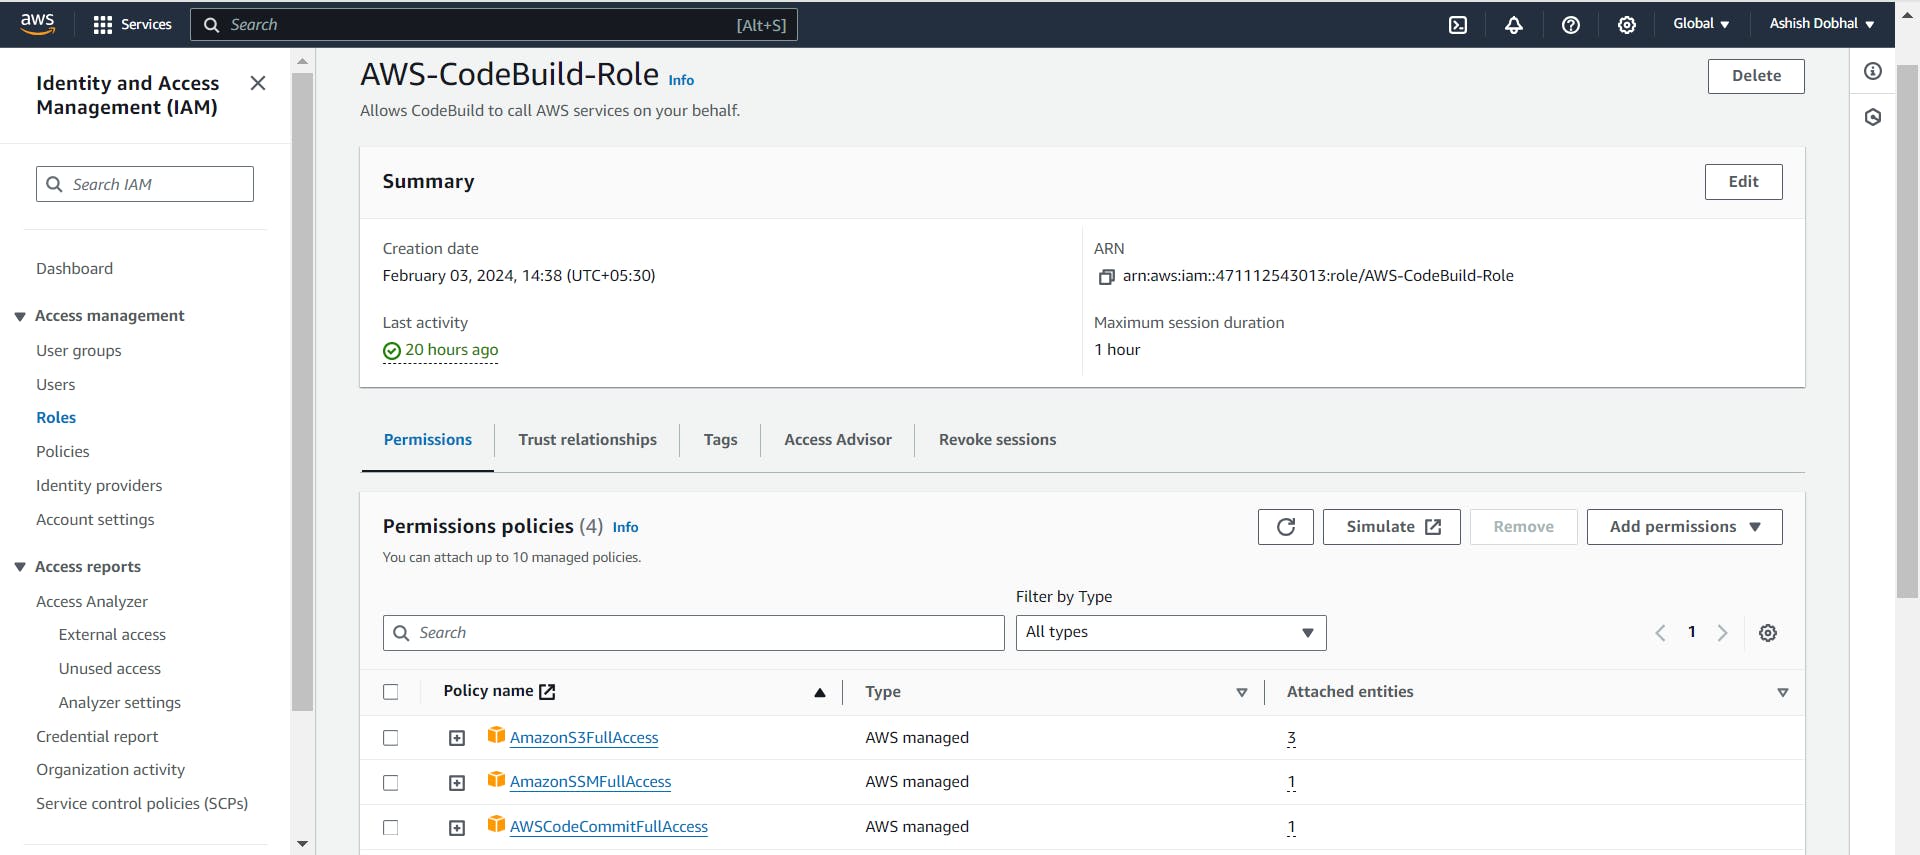
Setting Up Permissions for CodeBuild Service Interactions
During this project CodeBuild service will communicate with multiple different services. To ensure CodeBuild can interact with these services seamlessly, we must grant it the necessary permissions to avoid communication errors during the project.
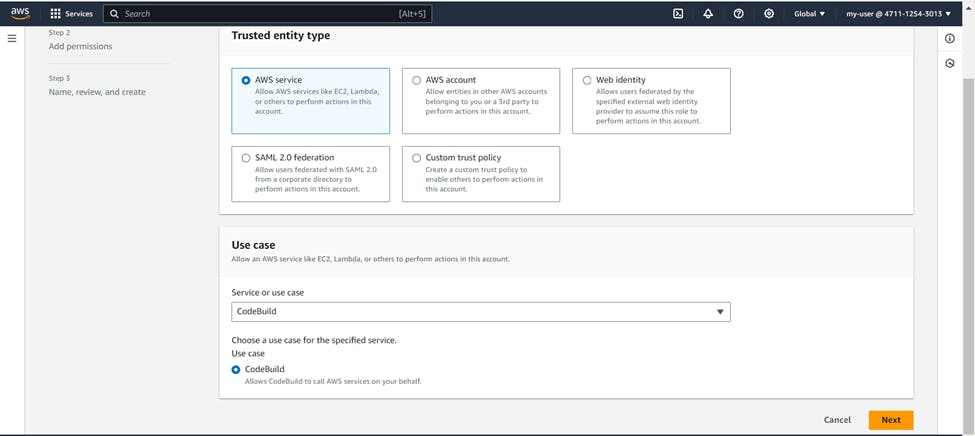
For this purpose, we'll create a new IAM role and assign the following permissions:
AWSCodeCommitFullAccess: Allows fetching code from CodeCommit.
AmazonSSMFullAccess: Enables credential validation from Systems Manager.
AmazonS3FullAccess: Permits pushing artifacts to an S3 bucket


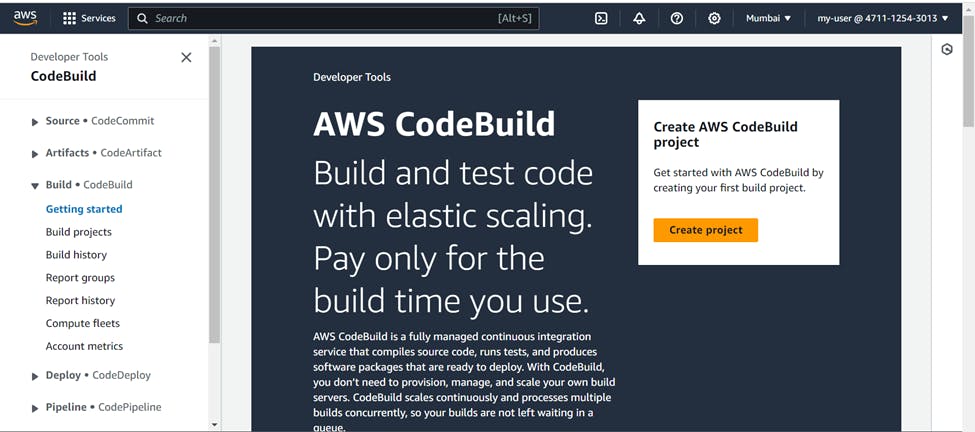
Build Project using CodeBuild service
Now as our buildspec.yml file is ready and all the permissions has been assigned to CodeBuild service, its time to build the project.
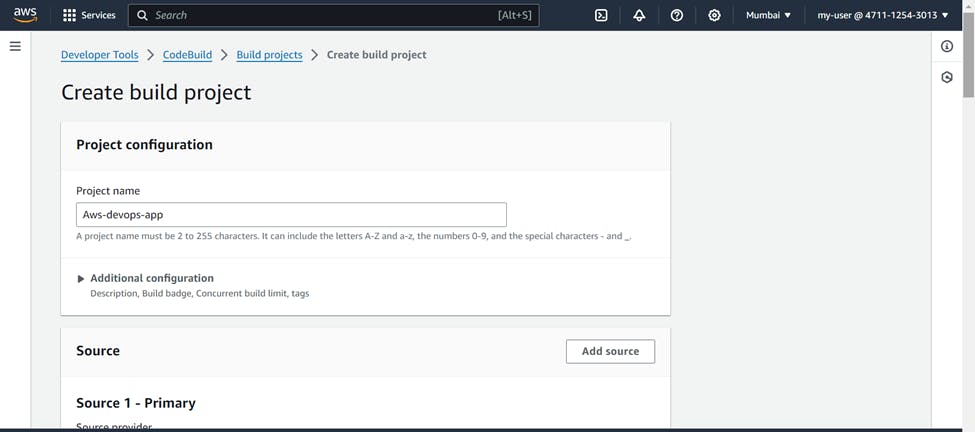
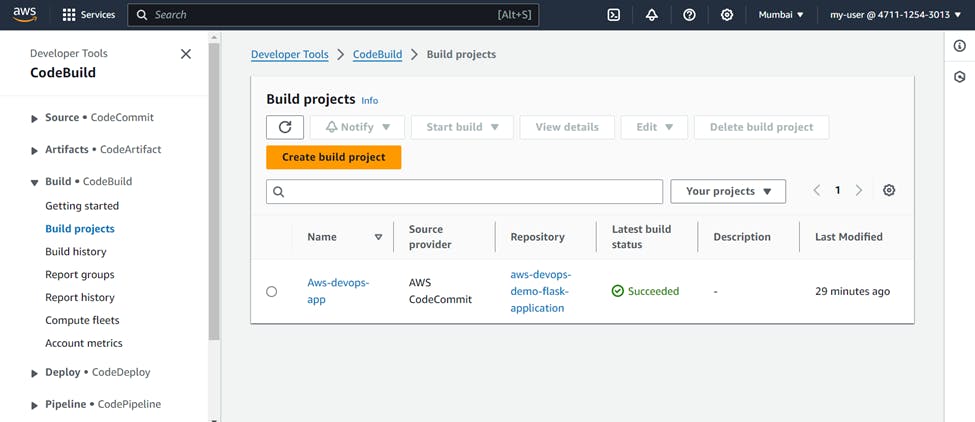
Go to AWS CodeBuild >>> Create Build Project

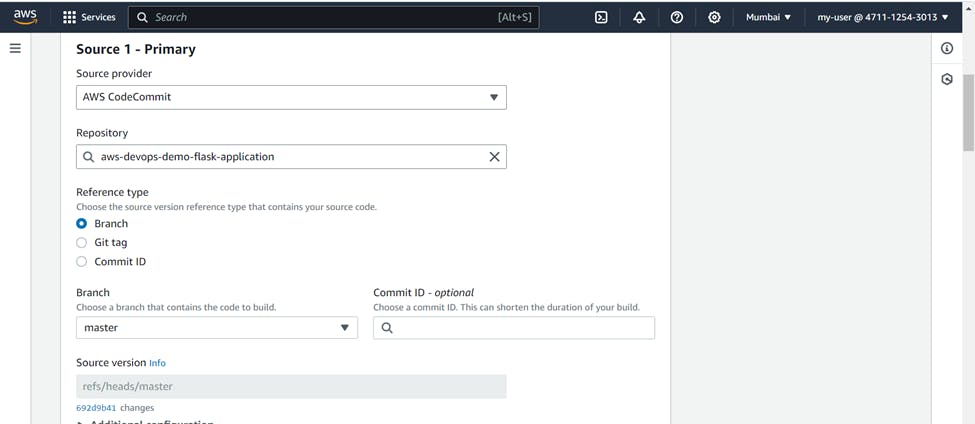
Name ( Your Choice ) >>> Source >>> service provider ( AWS CodeCommit ) >>> Branch ( Master )
Environment >>> Provisioning model ( On Demand ) >>> Compute ( EC2 ) >>> Operating system ( Ubuntu )

Runtime ( Standard ) >>> Image ( Latest one ) >>> Service role (Your CodeBuild Role)

In additional configuration >>> check on Privileged Flag ( This is necessary as without this the CodeBuild will not be able to build docker images )

In Buildspec >>> Select use a buildspec file ( as we already have buildspec.yml file in our CodeCommit repo, don't mention any name, it will be picked automatically while building project)

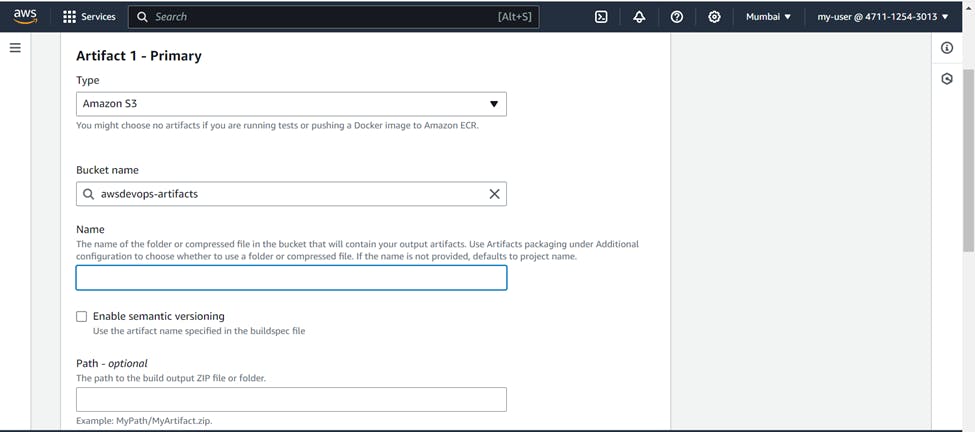
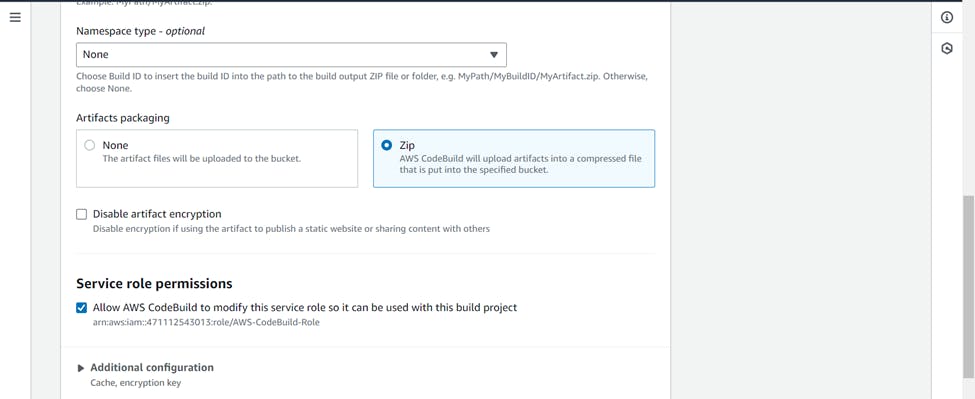
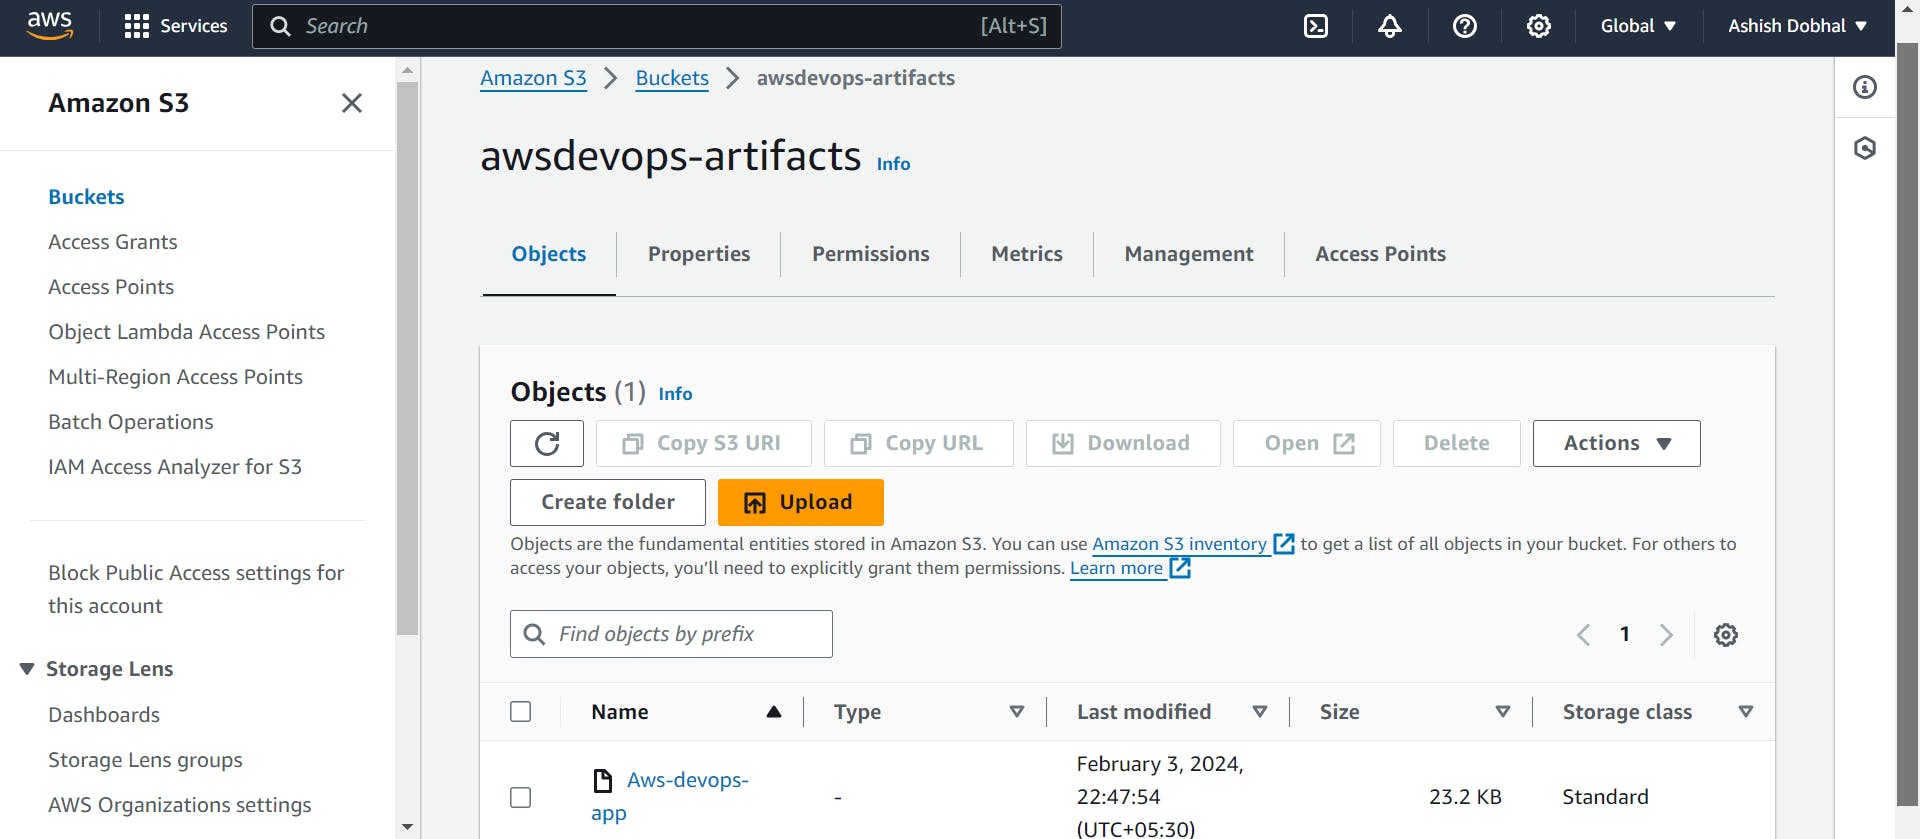
Artifact >>> Type ( Amazon S3 ) >>> Bucket name ( Name of bucket where you want artifacts to be stored ) >>> Artifacts packaging ( Zip)
It will collect the artifacts and store it as .zip file in your S3 bucket.
Check on CloudWatch Logs >>> Create build project

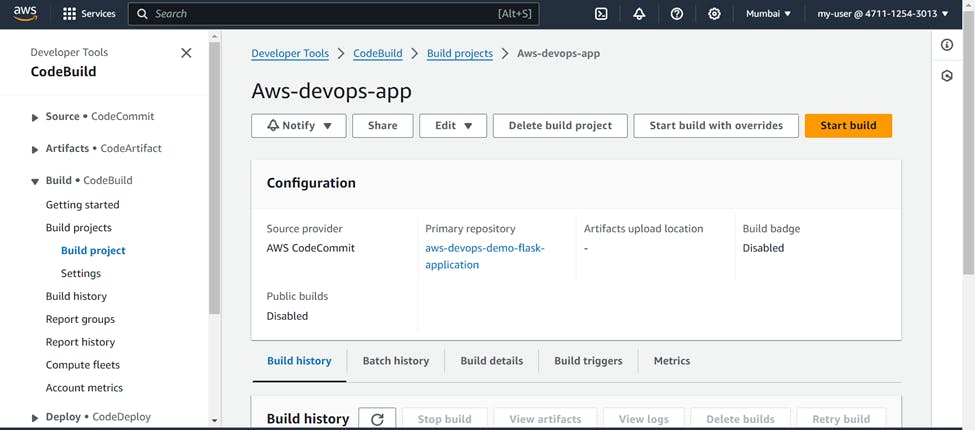
Now click on Start build and it will start the build process. You can see the different phases of build and logs also.

You will see After a successful build, the image will be pushed to Docker Hub

Also you can see the artifact file stored in your S3 bucket.
Configuring AWS CodeDeploy to deploy our application
Now that our image is ready, we'll use AWS CodeDeploy to deploy our app on the EC2 instance we set up before. Generally CodeDeploy allows you to deploy your application to various AWS services like EC2, Lambda, and ECS. But For this project we will deploy it on EC2 Instance.
Understanding appspec.yml file
Just Like we used buildspec.yml file in CodeBuild service, similarly In CodeDeploy, we will use appspec.yml to guide the deployment process. This file contains instructions on how to handle various steps during deployment, like where to copy files, how to start or stop services, and more.
version: 0.0
os: linux

hooks:
  ApplicationStop:
    - location: stop_container.sh
      timeout: 300
      runas: root
  AfterInstall:
    - location: start_container.sh
      timeout: 300
      runas: root
In our appspec.yml file, we are using simple scripts to guide the deployment process. Both the scripts are set to be run by root user.
First script is stop_container.sh, It checks if there is any container running from a previous deployment. If a running container is found, it proceeds to stop it. If no running container is found, it simply passes without taking any action.
#!/bin/bash
set -e

# Collect the running container ID (If any)
containerid=`docker ps | awk -F " " '{print $1}'`

#Stop the running container (if any)
docker rm -f $containerid
Next script is start_container.sh, it will pull the image from docker hub and runs the Docker image as a detached container (-d) and maps port 7777 from the host to port 7777 in the container. It ensures that the application inside the container is accessible via port 7777 on the host system.
#!/bin/bash
set -e

# Pull the Docker image from Docker Hub
docker pull ashishdevops007/python-flask-app-aws-devops

# Run the Docker image as a container
docker run -d -p 7777:7777 ashishdevops007/python-flask-app-aws-devops
Setting Up Permissions for CodeDeploy Service Interactions
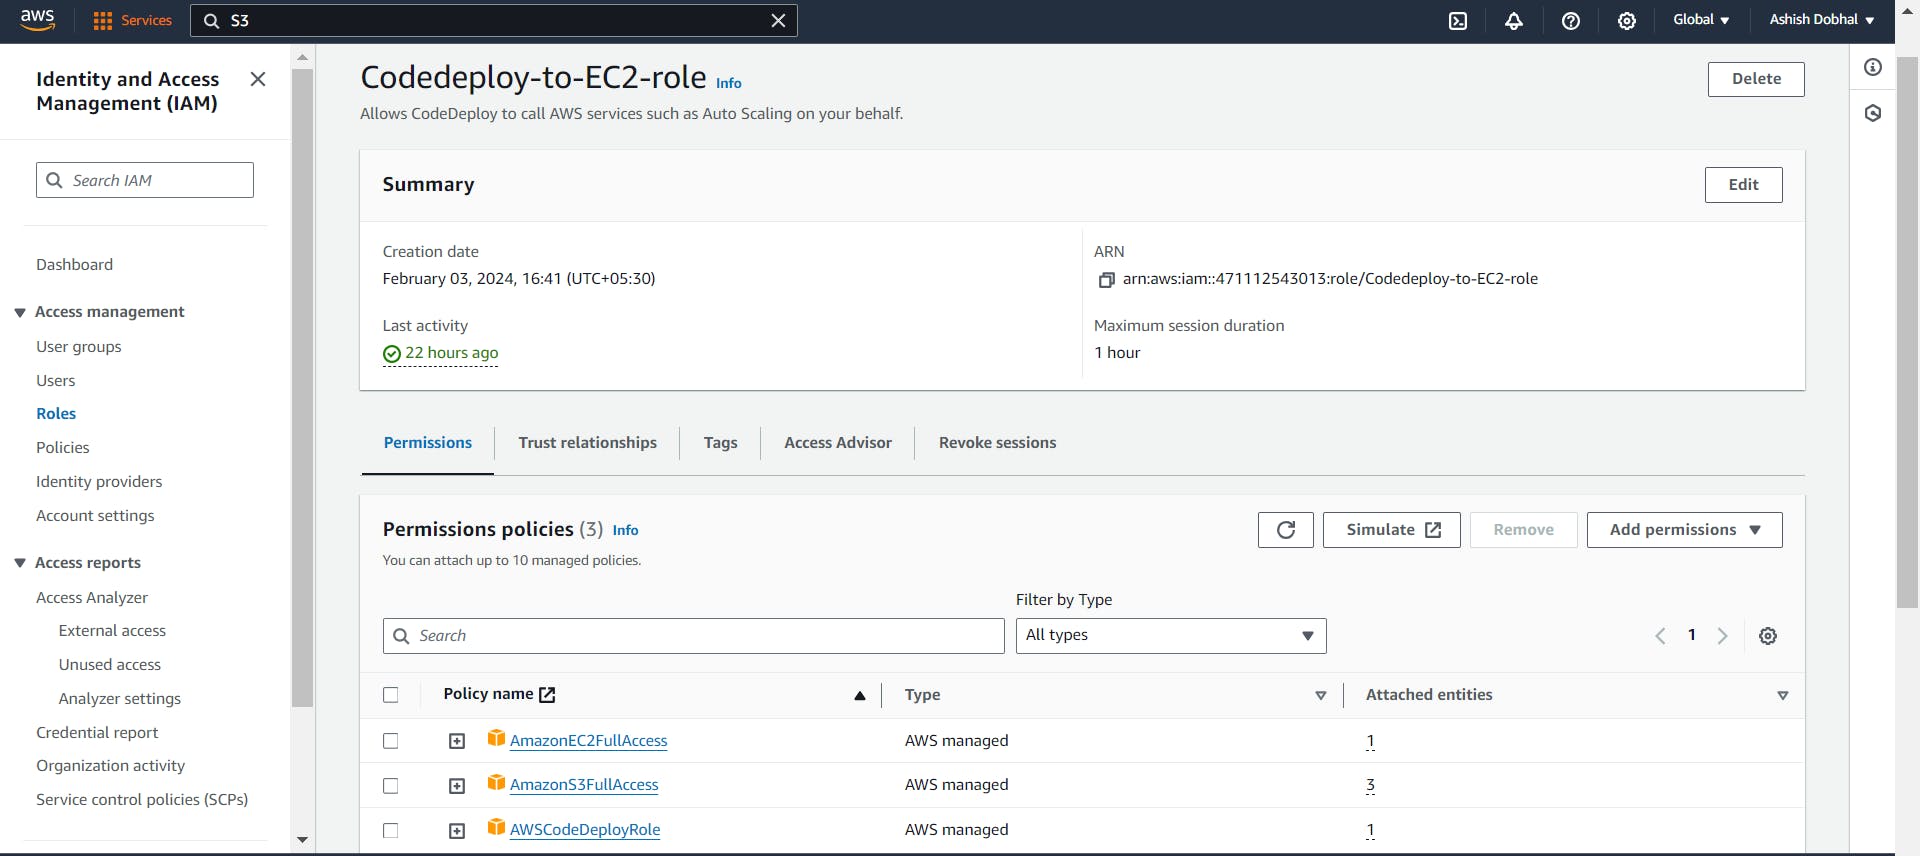
To enable seamless communication of CodeDeploy with various services during deployment, we'll create an IAM role with the following permissions
AmazonEC2FullAccess: To deploy applications on EC2 instances
AWSCodeDeployRole: Providing necessary permissions for CodeDeploy
AmazonS3FullAccess: Allowing CodeDeploy to read artifacts from an S3 bucket.
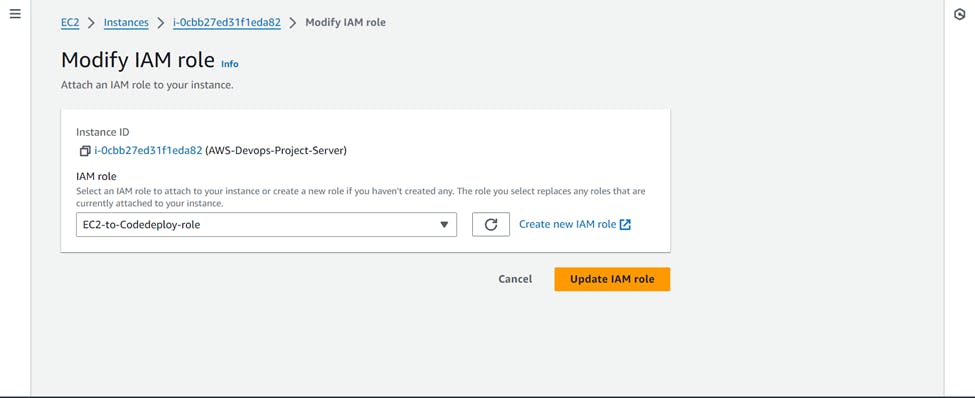
Similarly, to enable error-free communication during deployment, we need to grant additional permissions to the EC2 instance also.
For this purpose, we'll create a new IAM role and with following permissions:
AWSCodeDeployFullAccess: For seamless interaction with AWS CodeDeploy
AmazonS3FullAccess: Allowing communication with S3 buckets

Now we will attach this role to our EC2 instance.

Installing CodeDeploy Agent
The next step is to install the CodeDeploy agent on our EC2 instance. You can refer to the official AWS documentation for detailed instructions and a better understanding of this process.
https://docs.aws.amazon.com/codedeploy/latest/userguide/codedeploy-agent-operations-install-cli.html
You need to SSH into your EC2 Instance and run the below commands to install the CodeDeploy agent.
sudo apt update
sudo apt install ruby-full
sudo apt install wget
cd /home/Ubuntu
sudo wget https://aws-codedeploy-ap-south-1.s3.ap-south-1.amazonaws.com/latest/install
sudo chmod +x ./install
sudo ./install auto
sudo systemctl status codedeploy-agent
Please make sure to change the bucket name and region name as per your region in above command:
https://aws-codedeploy-ap-south-1.s3.ap-south-1.amazonaws.com/latest/install

If you had made changes in CodeDeploy or on the EC2 side, remember to restart the CodeDeploy agent to ensure it stays in sync with those updates
sudo service codedeploy-agent restart
sudo systemctl status codedeploy-agent

Also install Docker in your EC2 instance, so that it can perform docker commands.
sudo apt-get install docker.io

Build Deployment using CodeDeploy service
With everything configured, let's use CodeDeploy to build our deployment and deploy the application onto the EC2 instance
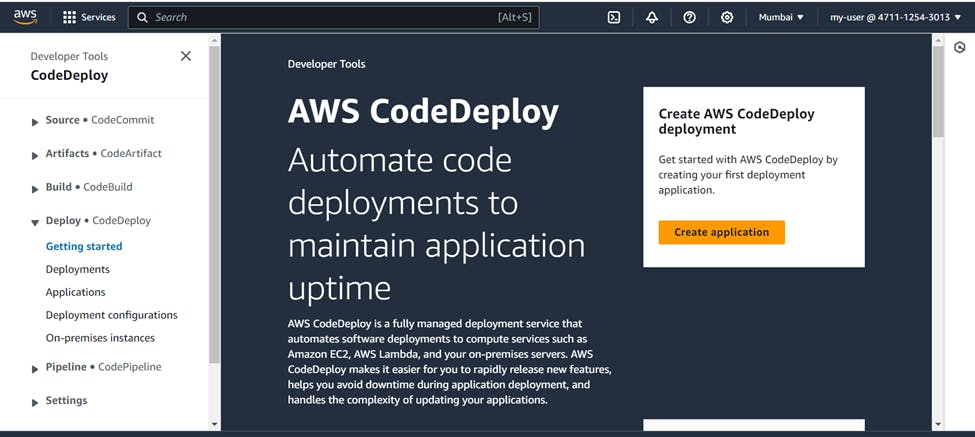
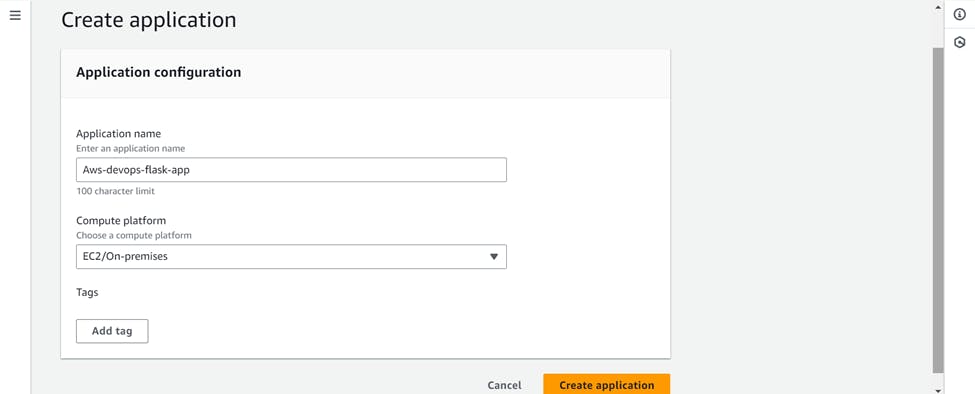
For this Go to AWS CodeDeploy >>> Create Application
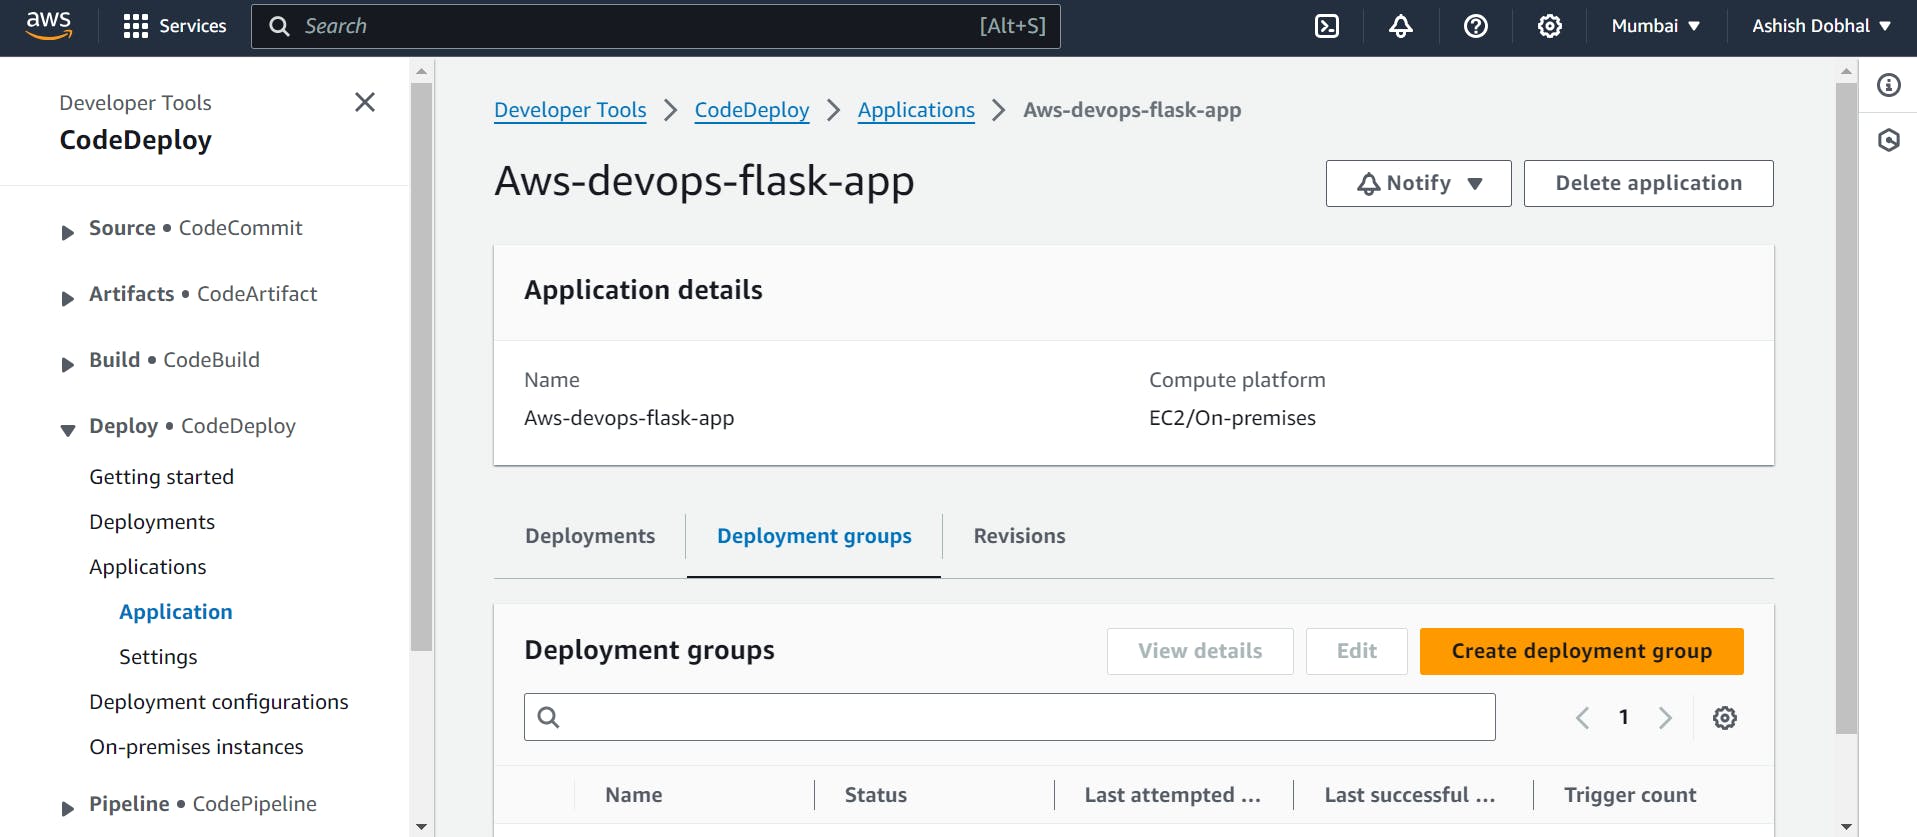
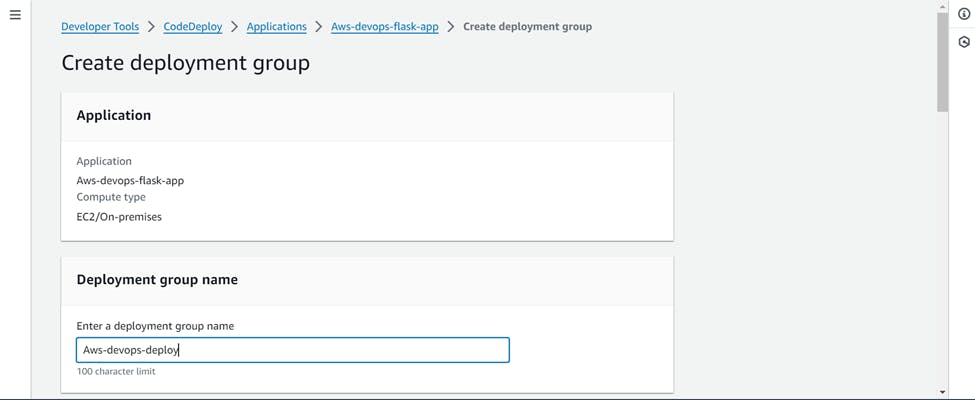
Next, we'll create our deployment group, which is a collection of EC2 instances where CodeDeploy will deploy the application.
Click on create deployment group >>> Name ( Your Choice )
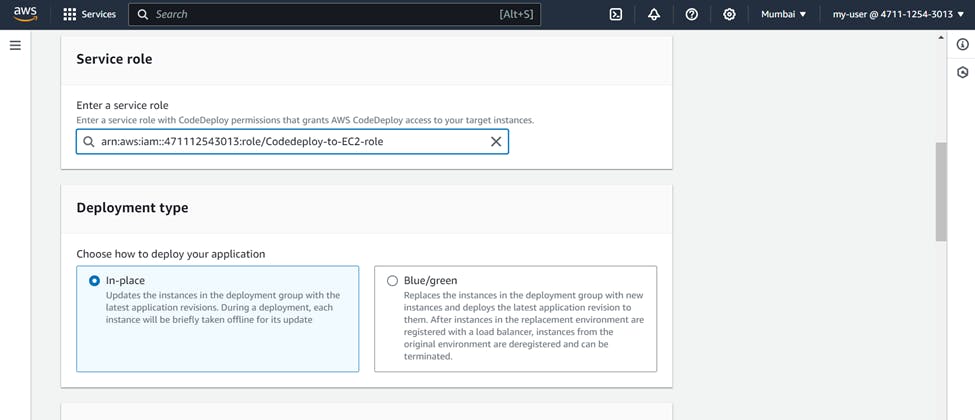
Choose your role which you created for CodeDeploy in service role section
And Deployment type >>> In-Place
In Environment configuration >>> Choose Amazon EC2 instance

Choose Name as tag and select your EC2 instance. It will automatically comes in matching instance.
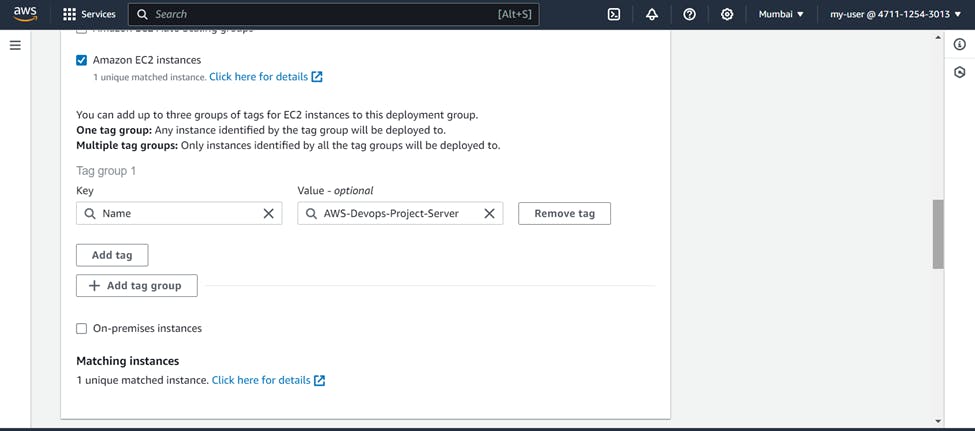
As we have already installed the CodeDeploy agent, we can choose "Never" in this section

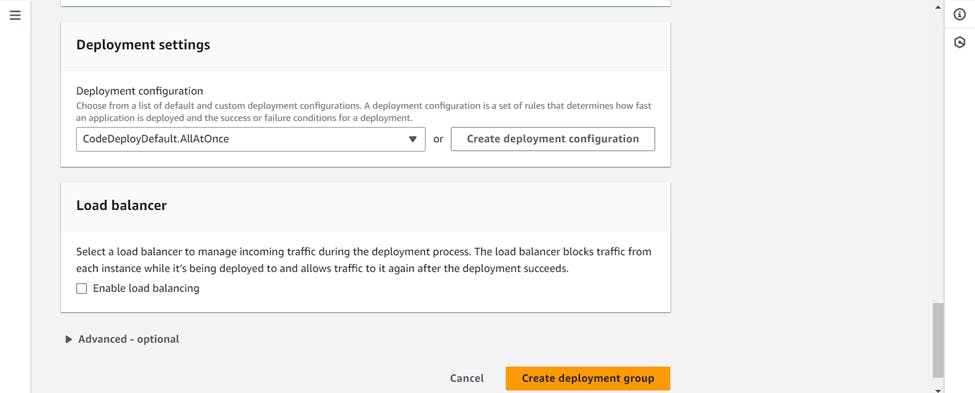
Uncheck on enable load balancer and Create deployment group.
Now the final step will be to create a deployment >>> Click on create deployment
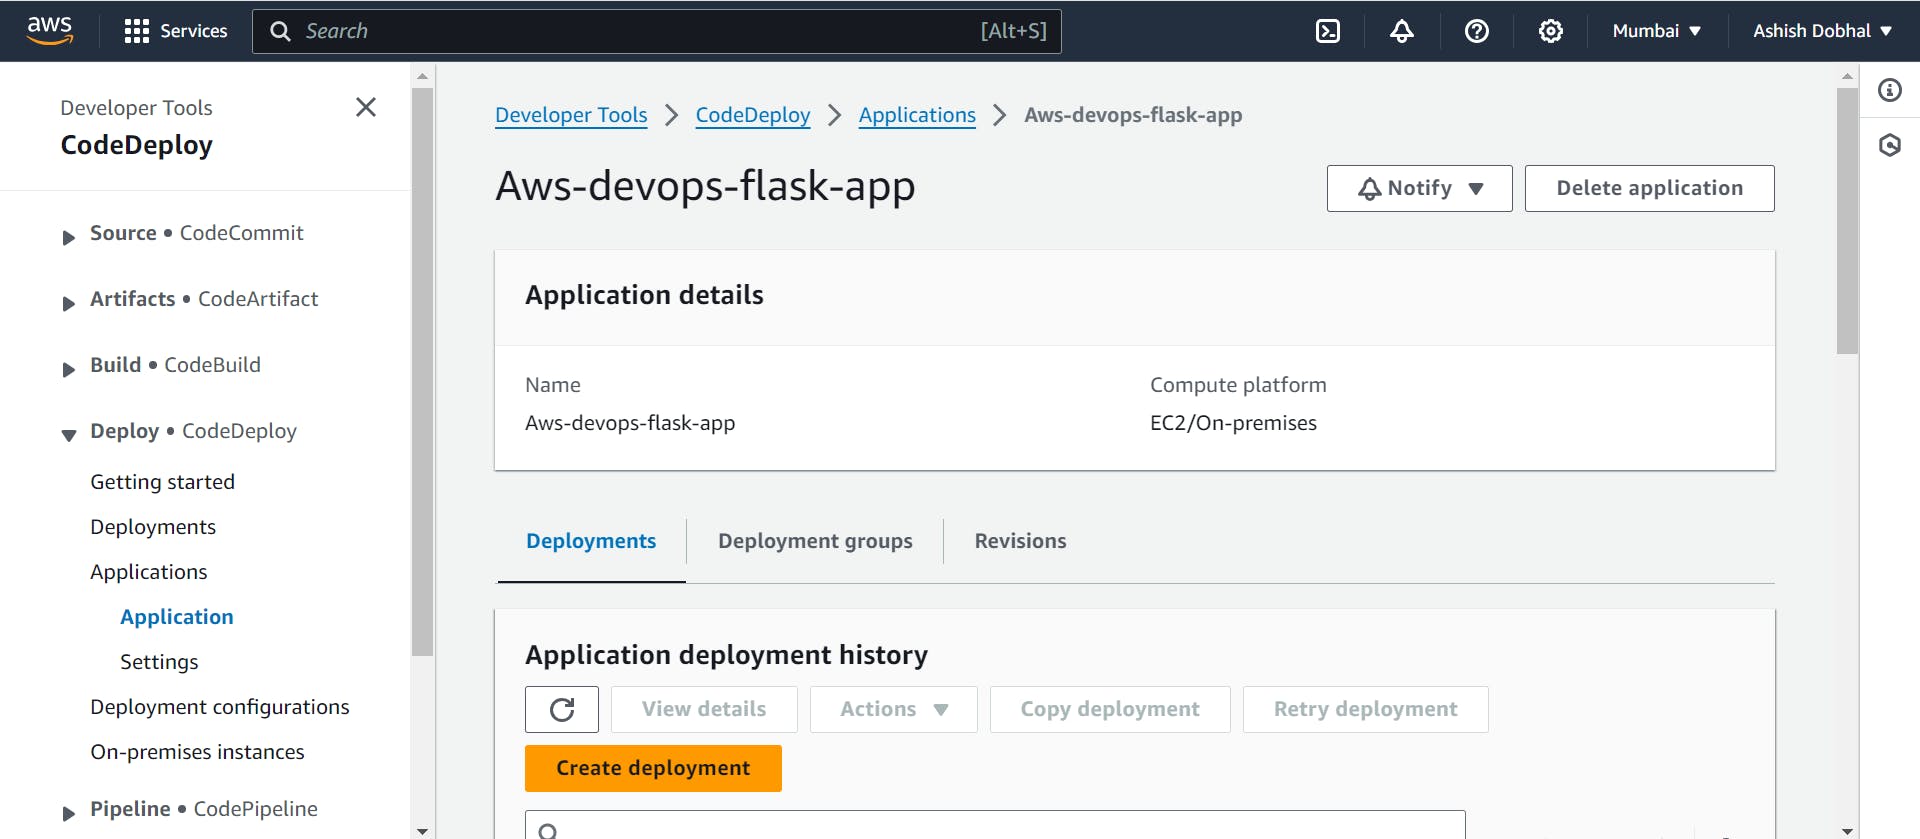
Choose name of your choice

In the revision type >>> Choose my application is stored in Amazon S3 as our artifacts are stored in a S3 bucket >>> paste the location of S3 artifact >>> revision file type as .zip
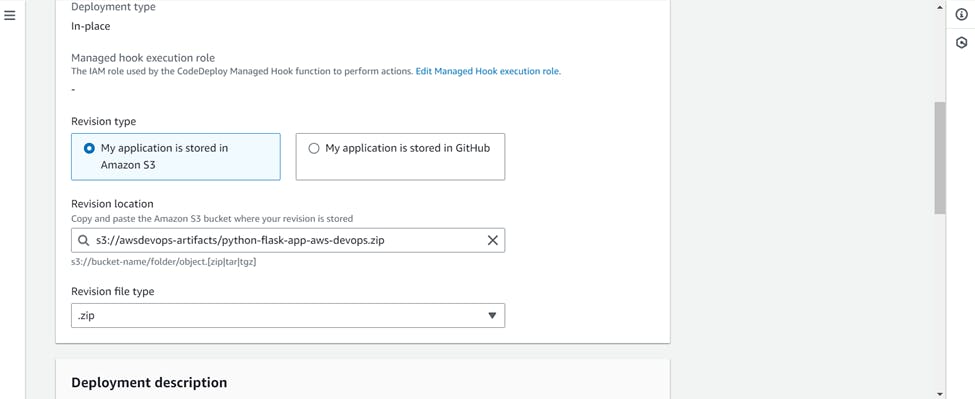
Keep rest settings as default and create deployment.

Now the deployment will be started, you can see the different stages of deployment.

In some time, your deployment will be succeeded.

Before viewing the output in the browser, ensure you open an inbound rule for port 7777 in the security group of your EC2 instance. This step is necessary since port 7777 has been exposed at the application level

Copy the public IP of your EC2 instance and access the output in your browser by navigating to that IP address on port 7777
http://public-IP-of-EC2:7777

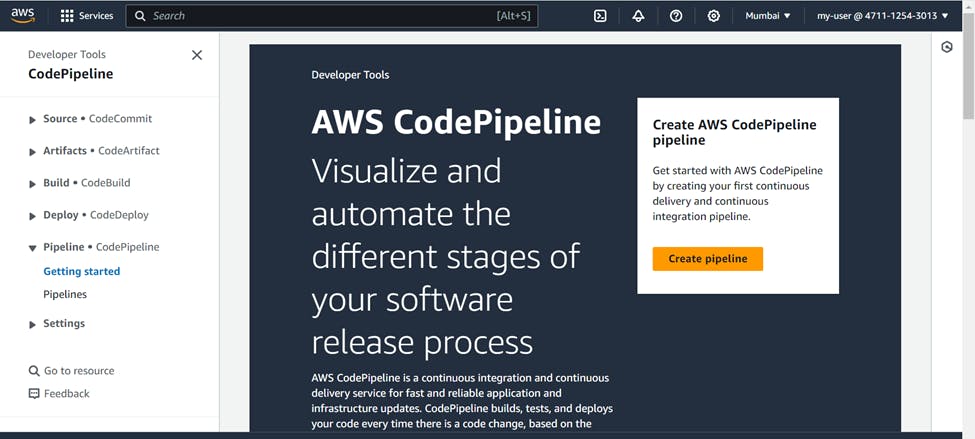
Automating Workflow with AWS CodePipeline
Now that we've configured CodeCommit, CodeBuild, and CodeDeploy, let's automate the process by creating a pipeline with CodePipeline.
For this go to AWS CodePipeline service >>> Create pipeline
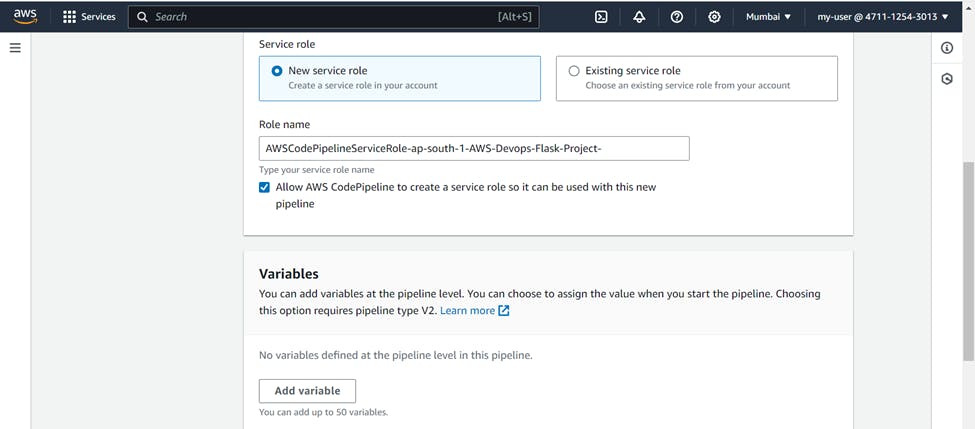
Name (Your Choice) >>> Pipeline type (v2)

For service role you can select >>> New service role
check on allow "AWS CodePipeline to create a service role so it can be used with this new pipeline"
For source stage >>> Source provider (AWS CodeCommit) >>> Repository name (Your CodeCommit repository name) >>> Branch (master)
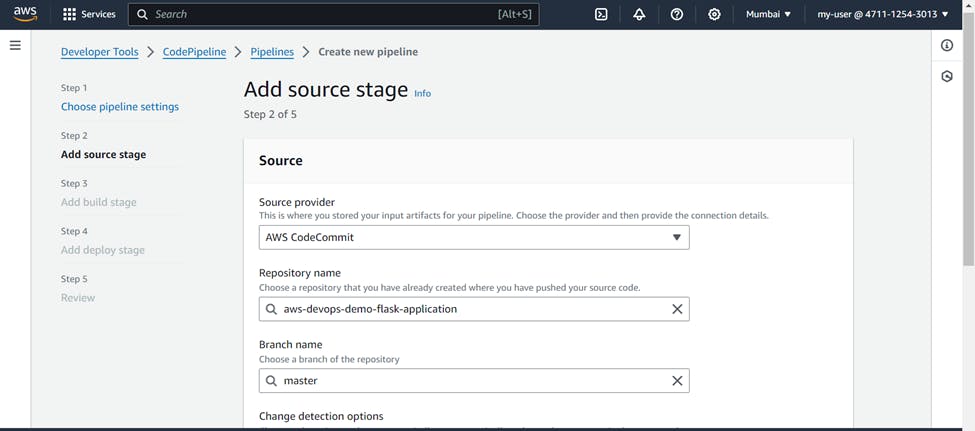
Detection options (Amazon CloudWatch events), this is recommended and will start the pipeline every time a change is made to the code in CodeCommit repository >>> Output artifacts format (CodePipeline default) >>> Next

For Build stage >>> Build provider (AWS CodeBuild) >>> Region (Your project region) >>> Project name (Your project name)
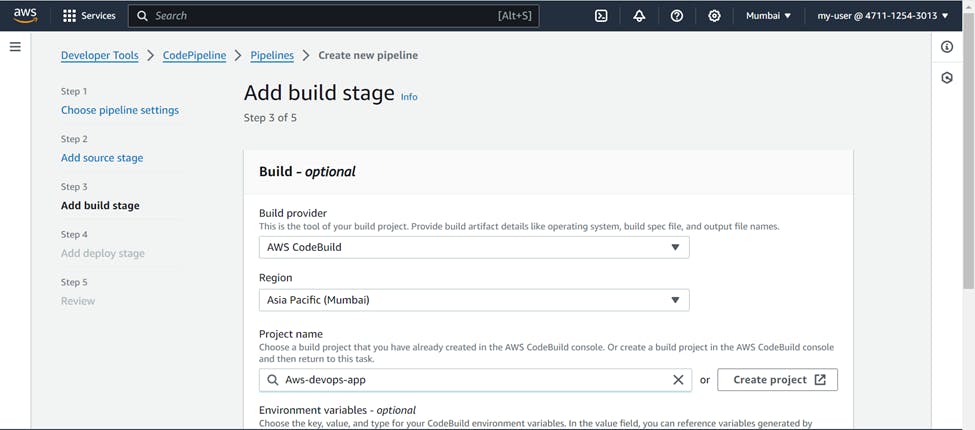
Build type (Single Build) >>> Next

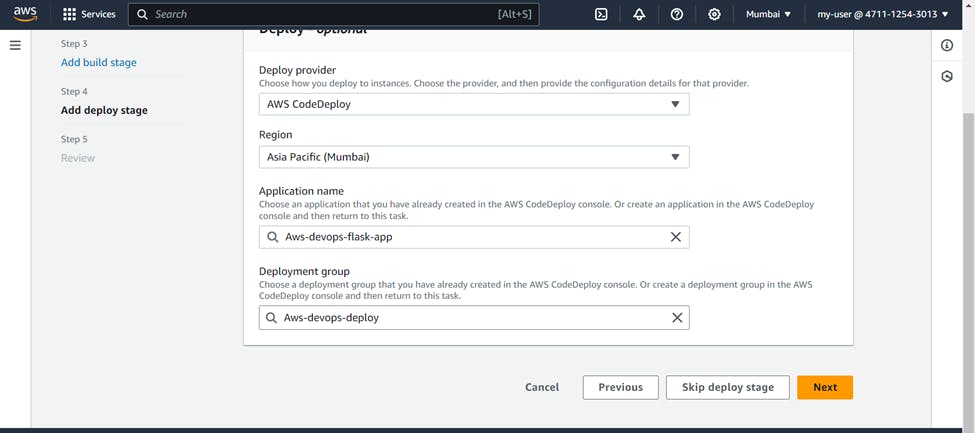
For Deploy stage >>> Deploy provider (AWS CodeDeploy) >>> Region (Your region) >>> Application Name (Your application name)

Deployment group (Your deployment group) >>> Next
Review all stages and create pipeline, also a new S3 bucket will be created as the default artifact store of your pipeline.

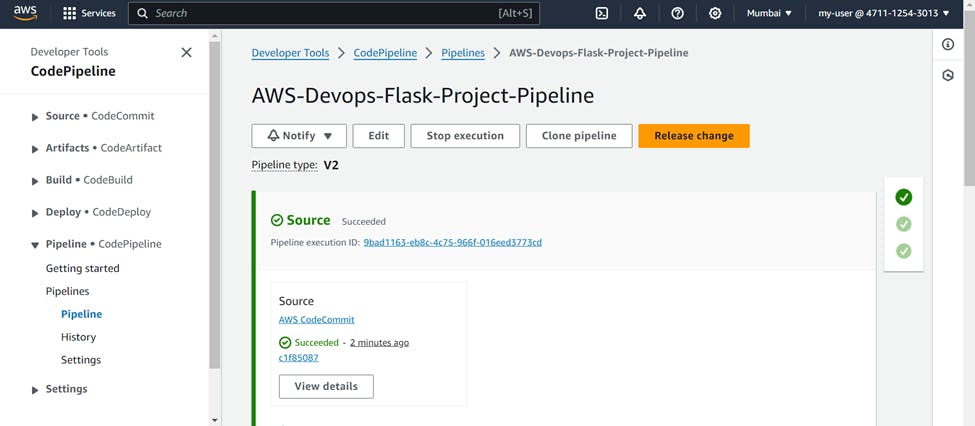
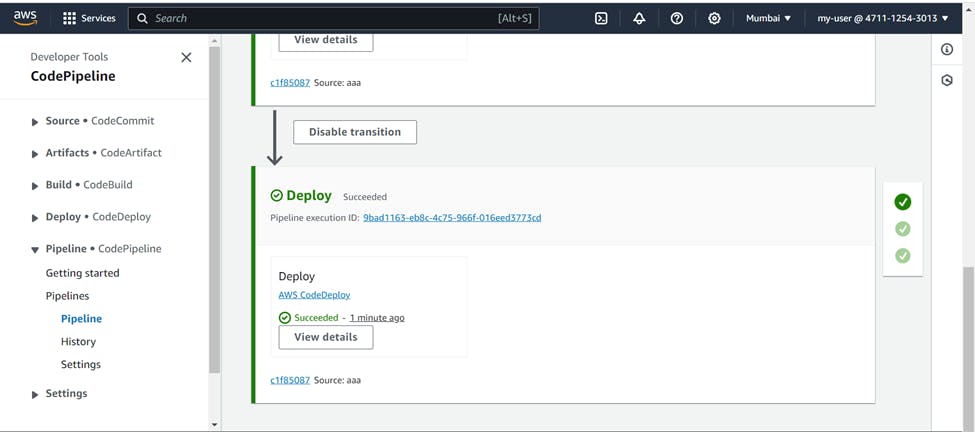
You will see all stages being succeeded one by one Source >>> Build >>> Deploy.
And after everything is succeeded you will see the result on the browser.

Also you can see the artifacts in the default S3 bucket of CodePipeline.

Now lets do the real automation, Make changes to your "app.py" file, commit them, and observe the magic. Once you push the changes, watch the pipeline kick into action automatically. Each stage will start running sequentially, just like clockwork.

As the pipeline got succeeded, go to the browser and see the updated home page.

Ensure to delete all resources, roles, and services once the project is completed to avoid unnecessary charges on your AWS account.
Conclusion
In conclusion, leveraging AWS services like CodeCommit, CodeBuild, CodeDeploy and CodePipeline streamlines the development and deployment processes in a DevOps project. With CodeCommit for version control, CodeBuild for building artifacts, and CodeDeploy for seamless deployment, teams can achieve efficient, automated workflows. This combination ensures reliability, scalability, and agility in delivering software solutions on the AWS cloud platform.
******************* Congratulations on completing this project *******************